
Need help now? Schedule a Toledo roof leak inspection!
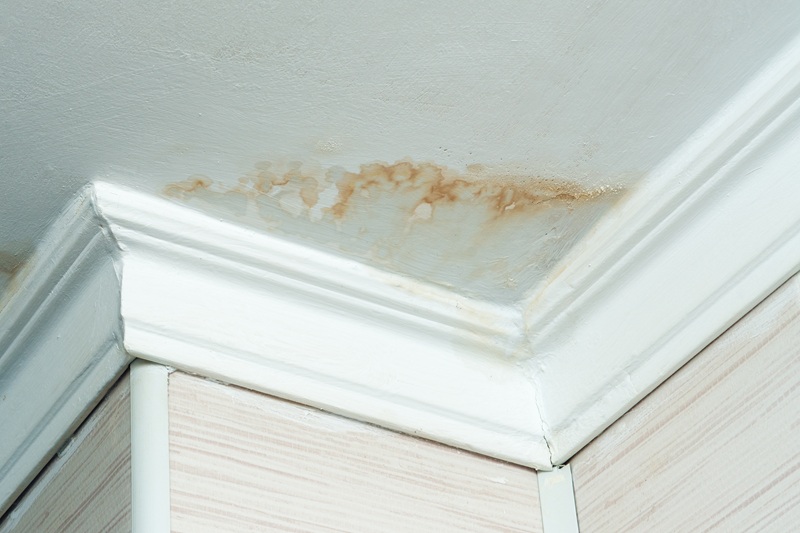
A roof leak in the middle of a Toledo winter can go from “one small drip” to soaked insulation, stained ceilings, warped flooring, and even electrical hazards, fast. The good news: what you do in the first 24 hours can dramatically reduce damage and make the eventual repair simpler (and often less expensive).
Below is a practical, step-by-step guide you can follow right now if you’re dealing with a roof leak emergency in Toledo, plus the most common winter leak sources we see, and the difference between safe temporary steps and the professional repairs that actually solve the problem.
Your first goal isn’t to “fix the roof” (especially not in icy conditions). Your first goal is to keep people safe and prevent water from spreading.
If you see active water near electrical components, keep clear and contact your utility, emergency services or a qualified electrician as appropriate. Once the area is safe, contact Top Roofing about the roof.
Containment is about controlling where the water goes.
If you notice a “bubble” forming in the ceiling drywall, water is pooling above it.
If the ceiling is significantly sagging across a large area, avoid standing under it.
Once the area is safe and electrical hazards have been addressed:
Even after the dripping stops, moisture can linger in insulation and drywall, drying early helps reduce long-term damage.
If you may file a claim (or even if you’re unsure), document now:
If you need photos/documentation for your claim, we can provide a roof inspection report.

A crucial thing to know: the spot where water appears inside is often not directly under the roof opening. Water can travel along rafters, decking, nails, ductwork, and insulation before it finally drips into your living space.
If it’s safe to do so, you can gather clues from inside, without climbing onto a slippery roof.
If you have attic access and it’s safe:
If you don’t have attic access (or it’s unsafe), you can still narrow it down by thinking about what’s directly above the leak area, bathroom vent, chimney, roof valley, skylight, dormer, etc.
In Toledo winters, ice dams are a frequent culprit. Here’s why they cause leaks:
Clues you may have an ice dam issue:
Long-term fixes often involve improving attic insulation and ventilation (not just replacing shingles).
Flashing is a metal material designed to seal roof-to-wall transitions and joints. Common leak points include:
Winter expansion/contraction can open small gaps that become significant leaks during wind-driven rain or melting snow.
Anything that sticks through the roof is a potential entry point, including:
In cold weather, rubber seals can become brittle, and older boots can crack. Leaks from penetrations often show up as dripping that worsens during melting periods.
Roof valleys (where two roof slopes meet) handle a high volume of water. If a valley is compromised, by debris, worn shingles, damaged underlayment, or ice buildup, leaks can happen quickly.
Dormers and roof transitions are also standard problem zones because they combine:
Gutters don’t make your roof “waterproof,” but they do influence where water goes.
In winter, gutters can:
If your leak appears near exterior walls, overflow and refreezing at the eaves may be contributing, even if the “roof shingles” themselves aren’t the original problem.
Not every “roof leak” is a hole in the roof.
In cold weather, warm humid air from the home can rise into the attic and condense on cold surfaces, leading to:
Clues it may be condensation:
A professional inspection can usually quickly tell the difference.

There are smart, safe steps you can take right away, and there are “quick fixes” that tend to fail (or make the final repair more expensive). The goal is to mitigate damage now and get a real diagnosis as soon as conditions allow.
Safe temporary measures usually happen inside the home:
If you have access to a roofing contractor that offers emergency mitigation, they may be able to install a temporary cover (such as a tarp), depending on weather and roof conditions.
These are common mistakes during a Toledo winter leak emergency:
Keep people away from electrical hazards or a sagging ceiling, and seek appropriate professional help first. Once the area is safe, contact Top Roofing, LLC for a roof assessment if:
For an active roof leak in Toledo, ask the contractor how the source will be assessed and whether temporary protection is possible under the current weather and roof conditions.
An honest repair is more than “patching the drip spot.” A thorough roofing pro will typically:
At Top Roofing, the goal of a leak visit is to identify the source and explain the repair options.
Once the immediate emergency is handled, prevention matters, especially with Toledo’s winter patterns:
If your roof is older, repeated leaks can signal that repairs are becoming more frequent than the roof’s remaining life warrants.
If you’re dealing with an active leak and need a Toledo roof repair, Top Roofing can help you move from damage control to a real fix, starting with a professional inspection and a plan that fits your roof and your timeline.

Homeowners insurance may cover a roof leak if a sudden, accidental event like wind damage, hail, or a fallen tree causes it. Damage from long-term wear, poor maintenance, or an old roof is usually not covered. It’s always best to document the damage quickly and contact your insurance provider as soon as possible.
Putting a tarp on a roof in winter can be dangerous due to ice, snow, and slippery surfaces. Professional roofers have the proper safety equipment and training to install tarps safely in cold conditions. If there’s an active leak, calling a licensed roofer is safer than attempting a DIY fix.
Roof leaks often occur after rain or snowmelt and typically cause localized stains or dripping. Attic condensation typically occurs in cold weather and can cause widespread moisture, frost, or damp insulation. A professional inspection can quickly determine the source and prevent unnecessary repairs.
An emergency roof leak visit typically includes locating the leak, performing a temporary repair or tarp installation, and documenting the damage. Roofers may also inspect surrounding areas to prevent further water intrusion. The goal is to stop active leaking and protect the home until permanent repairs can be made.
Mold can begin forming within 24 to 48 hours after moisture is present. Wood rot and structural damage can develop over weeks or months if the leak isn’t addressed. Prompt repairs help minimize health risks and costly long-term damage.
Yes, experienced roofers can repair leaks in winter, provided conditions are safe. Temporary fixes, flashing repairs, sealants, and tarping are commonly done during cold months. Complete repairs or replacements may be scheduled when the weather improves, but leaks should never be ignored.